-
Welcome to Celiac.com!
You have found your celiac tribe! Join us and ask questions in our forum, share your story, and connect with others.
-
Celiac.com Sponsor (A1):
Celiac.com Sponsor (A1-M):
-
Get Celiac.com Updates:Support Celiac.com!
Search the Community
Showing results for tags 'basic'.
Found 7 results
-

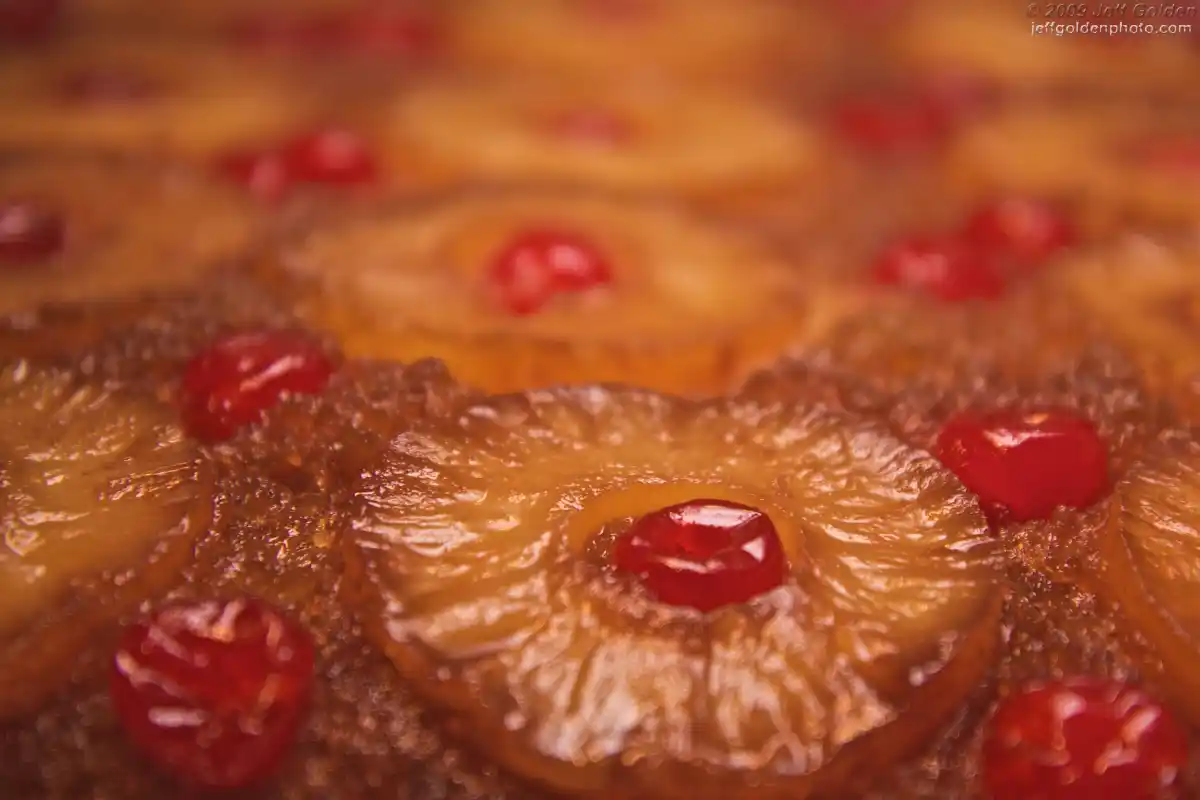 Celiac.com 08/05/2023 - A good basic cake recipe is a lot like a little black dress. Whether you dress it up or leave it plain, it’s right for any occasion. One Recipe; Many Choices This basic cake recipe can be served in many different ways. Of course, it’s great with no adornment—perhaps just a sprinkle of powdered sugar for old-fashioned goodness. But there are many, many other ways to use this versatile recipe. For example, bake cupcakes for your child’s next school activity. In fact, make an extra batch and freeze them. Next time your child announces at 9 PM that he or she has to take treats to school the next day, quickly defrost them, slather on your favorite frosting and you’re ready to go! Need a birthday cake? This recipe can be a yellow cake or white cake—sheet cake or layer cake. Add food coloring for a festive touch. When I was a child, my mother used to tint the batter either pink or blue, bake it in a Bundt pan, slice it in half cross-wise and insert a layer of ice cream. She then quickly frosted it with whipped cream and popped it back in the freezer. I thought it was pretty cool! Dressing It Up One of my favorite desserts from this recipe is Pineapple Upside-Down Cake or, as you’ll see in the photo below—Caramelized Pear Torte. It works best baked in a 10-inch cast-iron skillet or a 10-inch pan specially designed for upside-down cakes. Top this treat with a dollop of whipped cream and you’re in heaven. In the summertime when strawberries are plentiful, use this recipe as the "shortcake" in Strawberry Shortcake. For a decidedly festive effect, bake the little individual cakes in mini-cake baking pans (such as mini-Bundts or mini-angel food cakes). Follow the manufacturer’s directions for best results. These little cakes are so simple, yet guaranteed to impress your guests no matter how you serve them. They look lovely sitting on a tiered rack of festive plates. Sometimes I frost them, sometimes I dust them with a white cloud of powdered sugar, and sometimes I make a glaze of melted preserves for a pretty, shiny effect. Nestle a few fresh strawberries or raspberries among them—plus a few mint springs for color—and they’re special, regardless of what’s in them. One of the nice things about this recipe is that it’s so good, your family and friends won’t know— or care—that it’s gluten-free. And, if you have sensitivities to other ingredients (such as eggs), see my two books—Special Diet Solutions or Special Diet Celebrations—for instructions on substitutes, including using other sweeteners besides whites sugar. In fact, I used a similar basic cake recipe for the groom’s cake at my son’s wedding. See Special Diet Celebrations for wedding cake instructions. No one knew—or cared—that is was gluten-free! It was delicious! Follow the easy directions on the next page for making this simple classic into a winner at your house! Carol Fenster’s Basic Cake Ingredients: 1/3 cup unsalted butter or margarine 1 cup sugar 2 large eggs, beaten (or 3 egg whites for white cake) 2 teaspoons grated lemon peel 1 cup white or brown rice flour 1/3 cup potato starch 2 tablespoons tapioca flour 1 teaspoon xanthan gum 1⁄4 teaspoon baking powder 1⁄4 teaspoon baking soda 1/3 teaspoon salt 3⁄4 cup buttermilk (or 1 tablespoon lemon juice plus enough non-dairy milk to equal 3⁄4 cup) 1 teaspoon vanilla extract Directions: Preheat oven to 325ºF. Prepare pans, as directed below. Using electric mixer and large mixer bowl, cream together butter and sugar on medium speed until light and fluffy. Mix in eggs on low speed until blended. Add grated lemon peel. In medium bowl, sift together flours, xanthan gum, baking powder, baking soda, and salt. In another medium bowl, combine buttermilk and vanilla. On low speed, beat dry ingredients into butter mixture, alternating with buttermilk beginning and ending with dry ingredients. Mix just until combined. Spoon the batter into prepared pan(s). Bake as directed below. Cupcakes Grease pan or use paper liners in standard 12-muffin tin. Bake 12 cupcakes 20-25 minutes. Serves 12. Layer Cake Grease 9-inch round nonstick pan or two 8-inch round nonstick pans and line with waxed paper or parchment paper, then grease again. Bake 9-inch pan 35-40 minutes; 8-inch round pans 25-30 minutes. Cool on wire rack. Serves 12. Sheet Cake Grease 11 x 7-inch pan. Line with waxed paper or parchment paper if you plan to remove cake from pan before frosting. Bake 25-30 minutes. Serves 12. Pineapple Upside Down Cake Grease 10-inch pie plate or skillet (or special pan designed for upside-down cake). Evenly sprinkle 1⁄2 cup brown sugar over bottom of greased 10-inch pan. Arrange pineapple slices with cherries in center of each circle. Pour cake batter evenly on top. Bake 40-45 minutes or until top springs back when touched. Cool 5 minutes, then invert onto serving plate. Serves 12. Caramelized Pear Torte In 10-inch cast iron skillet sprayed with cooking spray, combine 3⁄4 cup brown sugar and 2 tablespoons water. Bring to simmer over low heat, swirling pan occasionally, until sugar dissolves. Cook for another minute, gently swirling pan if sugar is coloring unevenly. Remove from heat. Let cool for 10 minutes. Mixture will firm slightly as it cools. Wash and peel 3 firm, ripe pears. Cut in half, lengthwise; then cut in quarters. Remove core from each piece. Cut each quarter into 3 uniform-sized wedges. Arrange pears in pinwheel design, as close together as possible, in caramel. Pour cake batter evenly on top. Bake 40-45 minutes or until top springs back when touched. Cool 5 minutes, then invert onto serving plate. Serves 12. Reprinted with permission from by Carol Fenster, Ph.D. of Savory Palate Press Copyright © 2001
 -
This recipes comes to us from Melissa Boucher. 4 ½ cup gluten-free flour 1 ¾ cup sugar 7 teaspoons baking powder 2 teaspoons salt ½ teaspoon nutmeg ½ teaspoon cinnamon 3 eggs 2 teaspoons gluten-free vanilla 2 cup milk or water 1 cup oil Mix dry ingredients together. At medium speed beat eggs and vanilla. Add rest of wet ingredients. Add dry mixture. Makes about 2 dz. donuts. These freeze well and can be put in the microwave--80% power for 20-30 seconds.
-
Celiac.com 11/02/2012 - Risotto is a classic Italian rice dish, traditionally prepared with a starchy, short-grained rice called arborio rice. I came to love risotto, because it's one of the reliable gluten-free dishes you can find almost everywhere in Italy. With a few simple ingredients and about thirty minutes in the kitchen, the result will surprise and delight even the most picky eaters, and will make for a nice twist on the familiar macaroni and cheese. The procedure for making risotto involves stirring hot stock into the uncooked rice a ladleful at a time and cooking slowly as the stock is absorbed. This method of cooking the rice is, in fact, called the risotto method, and releases the starches in the rice to create a rich, creamy, risotto that is sure to please. This simple risotto recipe is made with butter and parmesan cheese. You can make endless variations by adding ingredients, such as mushrooms, seafood, lemon, etc. Ingredients: 1 quart chicken stock 1½ cups arborio rice ½ cup white wine 1 medium shallot, chopped (about ½ cup) 3 tablespoons of butter, unsalted ⅓ cup grated Parmesan cheese 1½ tablespoon Italian parsley, chopped 1 tablespoon olive oil Salt and pepper, to taste Directions: Heat stock to a simmer in a medium saucepan, then reduce heat to low, so the stock just stays hot, but does not cook or boil. Use a large, heavy-bottomed saucepan, and heat the oil and 1 tablespoon of the butter over medium heat. As the butter melts, add the chopped shallot, and cook for 2-3 minutes, stirring until shallots are slightly clear. Add the rice to the pot and stir it quickly with a wooden spoon or heat-proof spatula until all of the rice is well coated. Being careful not to let the rice get brown, cook for another minute or so, until the rice smells slightly nutty. Add the wine, and continue to stir and cook until the rice completely absorbs the liquid. When the rice looks dry, add a ladle of hot chicken stock to the rice and stir until the liquid is fully absorbed. When the rice looks to be nearly dry, add another ladle of stock and repeat the process. It's very important to keep stirring the rice while cooking, especially while the hot stock gets absorbed, to keep it from burning, and to add the next ladle of stock as soon as the rice is nearly dry. One ladle at a time, keep adding hot stock and stirring the rice until the liquid is absorbed. As it cooks, the rice will become creamy as the starches begin to escape. Keep adding stock, one ladle at a time, for 20-30 minutes or until the grains become tender, but still firm to the bite. They should not be crunchy. If you run out of stock and the risotto still isn't done, you can finish the cooking with hot water. Just add the water one ladle at a time, the same way you added the stock, and keep stirring until it is absorbed. Stir in the remaining 2 tablespoon butter, the parmesan cheese and the parsley, and season to taste with salt. Risotto turns glutinous if held for too long, you should serve it right away. When risotto is cooked properly, it will make a soft, creamy mound on a dinner plate. It should not be runny, and it should not be stiff or glue-like.
-
For one 9in x 13in pans worth: ¾ cup butter or margarine ¾ cup cocoa powder 2 ¼ cup sugar 4 eggs 2 teaspoons vanilla 1 1/3 cup gluten-free flour (used Bette Hagmans mix plus Xanthan Gum) 1 cup chopped nuts (if desired) ½ teaspoon baking powder ¼ teaspoon salt Preheat oven to 325F Grease (not oil) and lightly cocoa (instead of flour) 9x13 pan. In large sauce pan, melt margarine/butter with cocoa over low heat, stirring constantly (actually, I just put the cocoa and butter in a bowl, stick it in the microwave for a couple of minutes, until the butter is melted. Stir with a fork until its mostly smooth. Remove from heat and cool slightly. Blend in sugar. Beat in eggs, one a time. Stir in remaining ingredients. Spread in prepared pan. Bake at 325F and check after 20-25 minutes (I use a stoneware pan and it takes about 10 minutes longer than in a metal pan). I consider them done when whatever is stuck in the middle to check for doneness (toothpick, butter-knife, whatevers handy) comes up a bit moist, but not with a great deal of chocolate adhering to it. Im aiming for a slightly gooey middle and somewhat cake-like edges. Its safe to say that they will not be done before 20 minutes unless your oven really cooks on the hot side.
-

Majority of Restaurateurs and Chefs Fail Basic Celiac Test
Jefferson Adams posted an article in Additional Concerns
 Celiac.com 07/02/2012 - Dismal results on a simple, four-question quiz show that most chefs and restaurateurs lack the most fundamental knowledge of gluten-free facts and protocols; a reality that could leave many gluten-free diners at risk of gluten contamination. The quiz was administrated at the National Restaurant Association Show in Chicago by the National Foundation for Celiac Awareness (NFCA), a non-profit organization that promotes awareness of celiac disease and gluten sensitivity. Even though a large number of chefs and restaurateurs said they offered gluten-free options at their restaurants, less than 4 percent responded correctly to the gluten questionnaire. People with celiac disease or gluten-intolerance must avoid gluten from wheat, rye and barley, but fewer than half of the chefs could name a grain, other than wheat, that contained harmful gluten. The results showed that the chefs were both poorly informed, and unaware, said Alice Bast, founder and president of NFCA. In addition to asking chefs to name all three grains that trigger a reaction in people with celiac disease, the quiz asked what kind of oats are safe for those people. There were two other questions, one that asked chefs to identify a possible gluten-containing product (Worchestershire sauce) from a short list of foods and products, and another that asked if it was true that celiac disease was triggered by glucose (false). The results point to the need for more celiac disease and gluten-sensitivity training and awareness in the food industry, especially since the number of establishments seeking to offer gluten-free options for their patrons continues to grow. Source: http://www.pizzamarketplace.com/article/195015/Majority-of-restaurateurs-and-chefs-fail-celiac-test
 -
 Serving Size: 12 1 cup sorghum flour ¾ cup gluten-free Flour Blend ¼ cup Sweet Rice Flour 1 teaspoon xanthan gum 2 teaspoons sugar 3 teaspoons baking powder ½ teaspoon cream of tartar ¼ teaspoon salt ½ cup shortening -- cubed 1 egg ½ cup milk Crack egg into large measuring cup. Add milk to make 2/3 cup of liquid. Lightly beat together. Set aside. Sift all dry ingredients. Place in food processor. Pulse in cubed shortening. Add milk/egg mixture. Pulse until dough is formed. I usually wrap dough in plastic wrap and chill 1 hour or overnight, but you could roll or pat it out right away and use a biscuit cutter to cut biscuits. Place on baking sheet and bake at 450 degrees for 10 min. I usually brush melted butter on them the last couple of minutes. This helps them to brown a little bit better.
 -
This recipe comes to us from Cory Bates 3 Eggs 1 teaspoon vinegar ¼ cup oil 1 1/8 cup water 3 1/3 cup gluten-free flour mix 3 tablespoon sugar 1 ½ teaspoon Salt 2/3 cup dry milk 2 ¼ teaspoon active dry yeast Add all wet ingredients to bowl, mix well, and set aside. Combine all dry ingredients in another bowl and mix well. Slowly add dry ingredients to liquid stirring constantly. Beat for several (5-7) minutes with a mixer or vigorously by hand to insure complete mixing. The dough will be the consistency of very thick cake batter. Place dough in slightly greased bowl, cover, and set in warm place. Allow to rise until about double in size. Punch the dough down and fold out into bread pan coated with cooking spray. Smooth out any bumps on top of dough ball with your finger. Cover and allow to rise until about double. Place in 375 degree preheated oven for 35 minutes. Cover top of bread with aluminum foil and bake an additional 20 minutes. Enjoy! This recipe also works well in bread machines. Set to normal cycle, large loaf size and follow directions for your bread maker. Make sure that all the ingredients are well blended during the mixing stage by checking periodically and pushing any remaining dry ingredients downward with a rubber spatula being very careful not to touch the mixing blade. The flour formulation worked well with muffins, cookies and biscuits as well. 1:1 substitution for normal flour gave good results in these recipes.
Celiac.com Sponsor (A8):
Celiac.com Sponsor (A8):
Celiac.com Sponsor (A8-M):
Celiac.com Sponsor (A8):
Celiac.com Sponsor (A8):
Celiac.com Sponsor (A8-M):